HOME
Week 7: Slicer Mini
Laser cutting a 3D Cardboard Object.

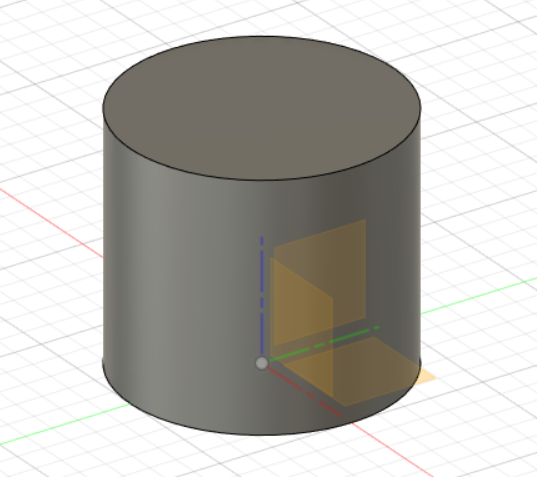
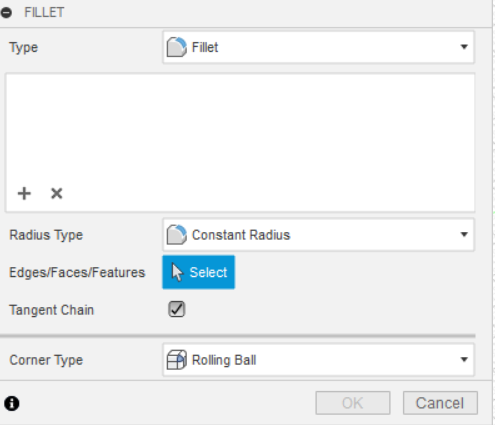
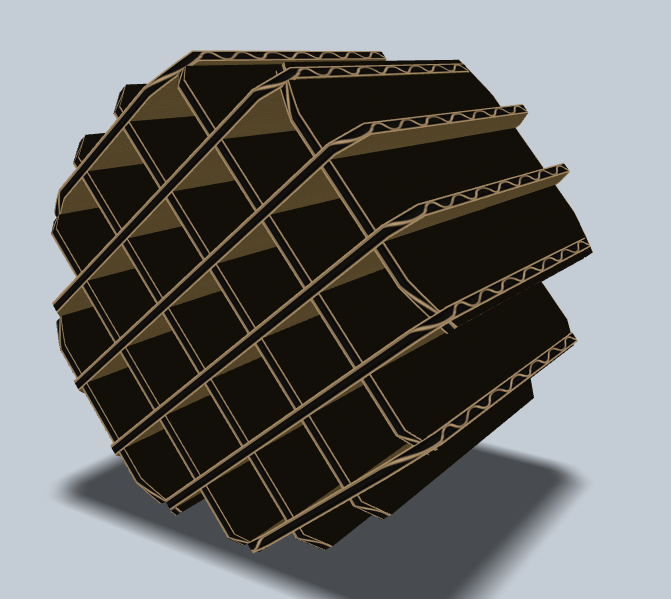
To start this project I had to make my shape for what I was going to slice out of cardboard. For this step, I went ahead and used Fusion360 this is a program I'm rather comfortable using so I decided to go with that from here after a bit of brainstorming I decided to go basic and use a cylinder as a base. From this, I looked at different ways I could make this less basic in design but still minimalistic so I looked around and found the fillet tool. I would then make two basic slopes after testing the tool out leaving me with the final design before moving on. 


The next step had me export my file to an stl and import it into slicer. Here I decided to roll it onto it's side because I thought it would be neat looking. 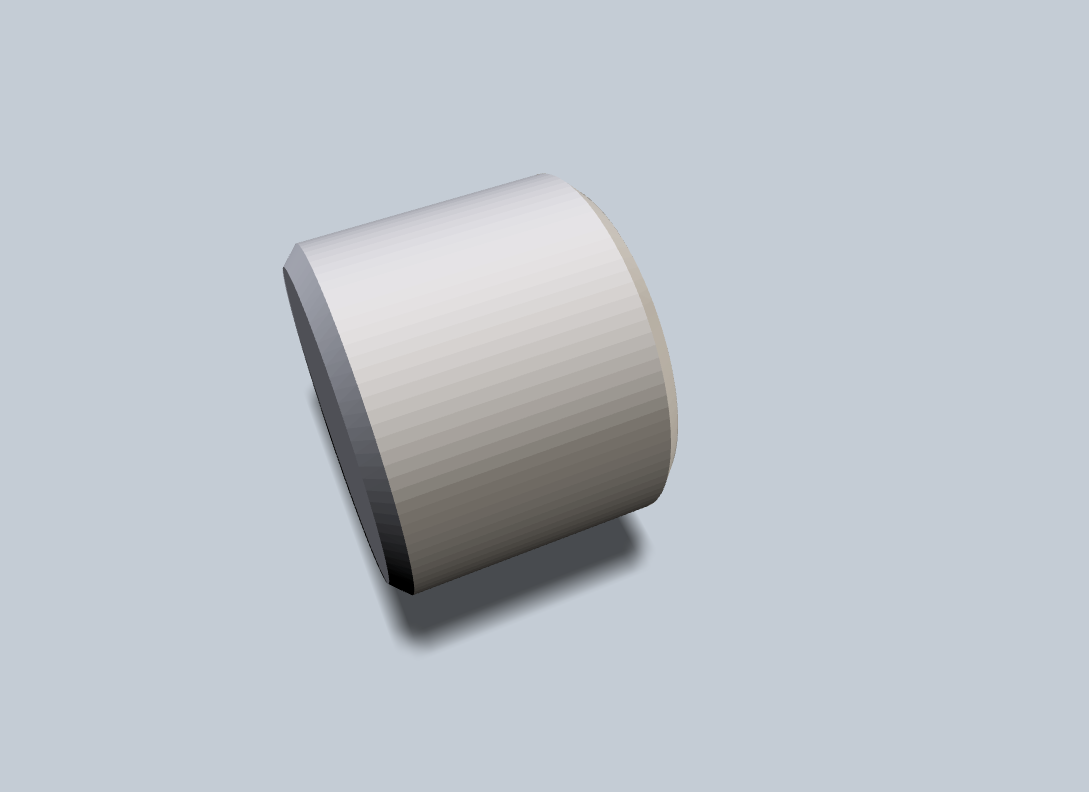
The next step would be to format my design into interlocking slices.  From here I adjusted the layout and messed with the rotation of the design
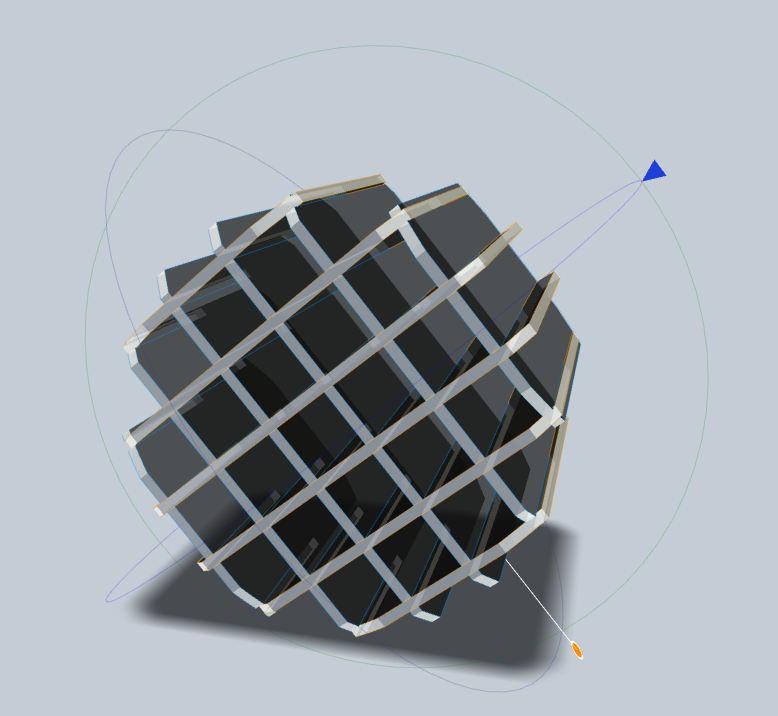
I would then look at the cut plans in addition to the cardboard preview. 
The next step would be to export these plans to Illustrator. 
After importing the plans I had the task to nest each part of the design to conserve material to prevent waste luckily for me this was straightforward with the properties of the design. Following the nesting I adjusted the line width and was ready to cut. 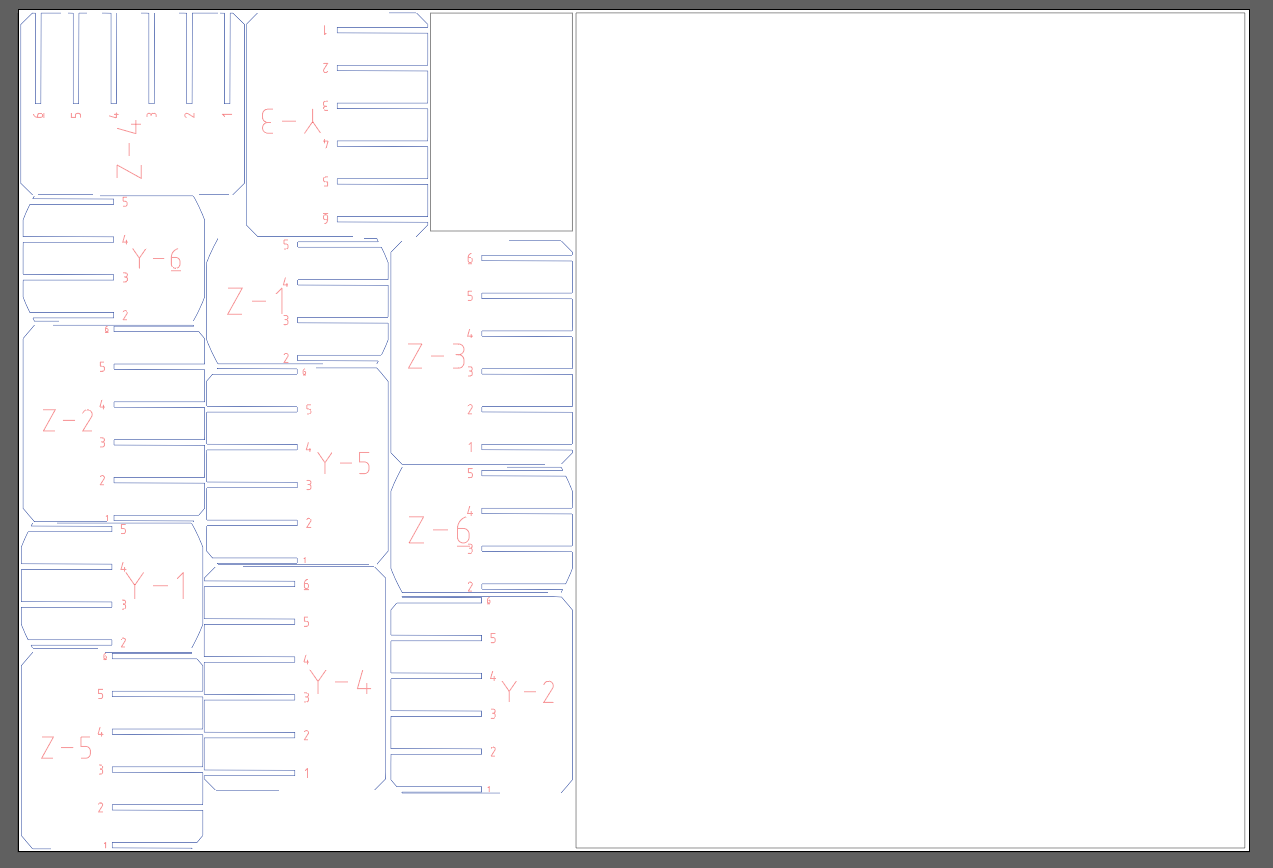

The next thing I had to do was laser cut and assemble but here we hit some issues. Wheaton had gone back into modified quarantine before I laser cut the cardboard leading to my professor cutting the material out for me. I had additionally picked up my cardboard hours before my brother and I were to be picked up and headed home for the semester so there's a sheer lack of images aside for the few I took during my time crunch: 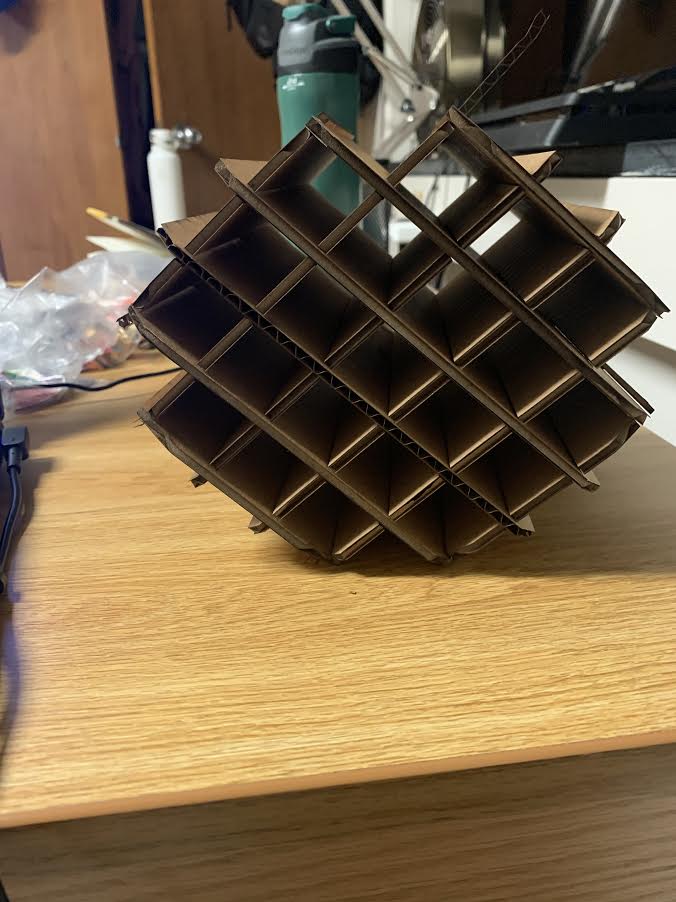

Link to the files: here